- Metal Detecting News
- Pages
- John R's review of the Composite Cleaning Pencil
Composite cleaning pencil 11/07/2025 by J.Ritson
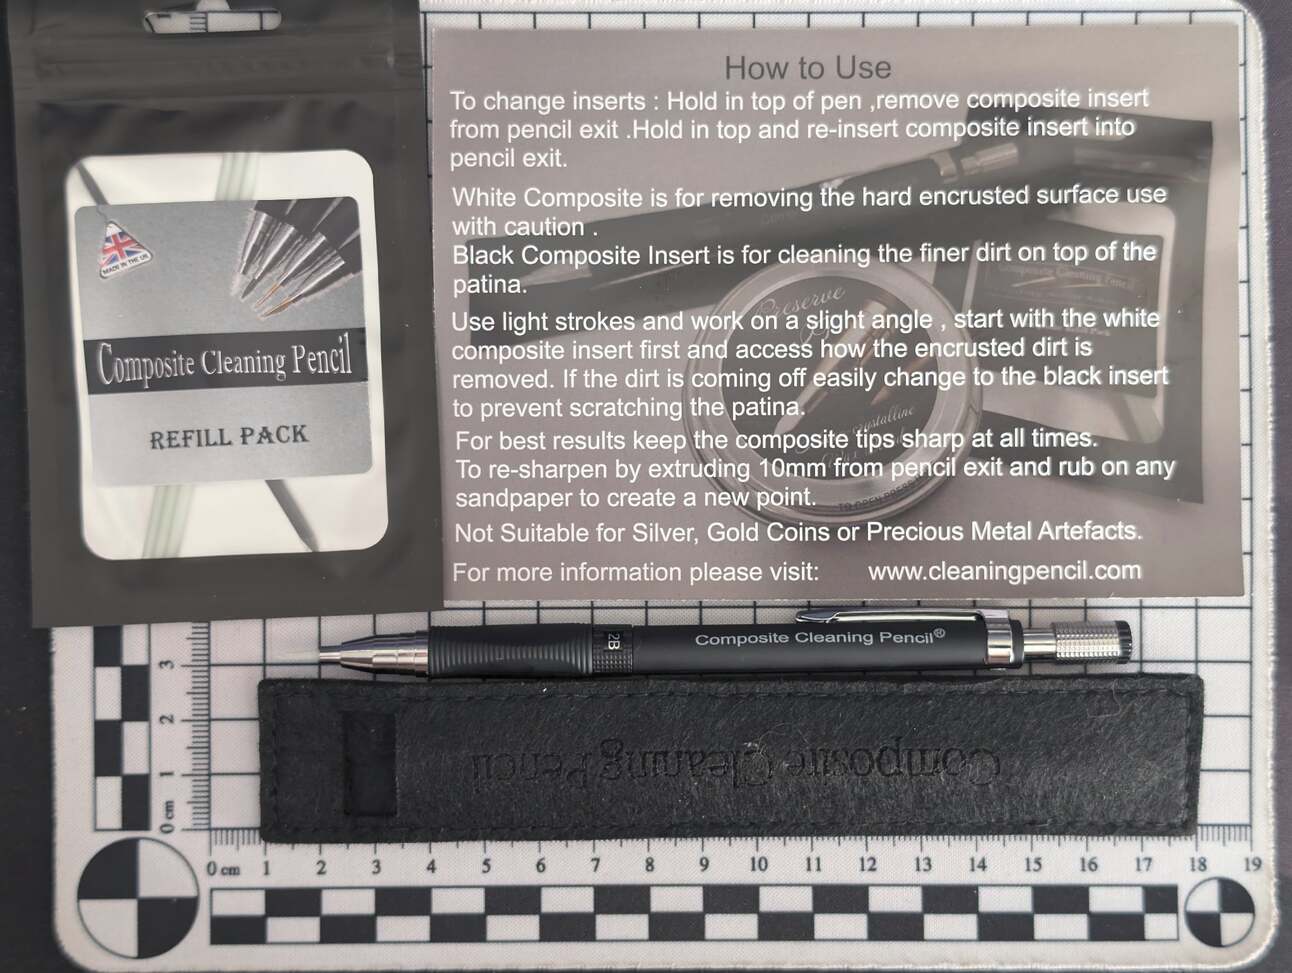
A big thank you goes out to Metal Detecting News! As a member, I was the winner of the draw for the composite cleaning pencil, for which I am eternally grateful and will use, at least when I start finding things again as it has gone quiet! As a bonus, I thought I would ‘pencil’ my experience with one of the coins I own which has no materialistic or historical interest. Without going too deep, I will state this warning: you may do irreparable damage to a coin if you are not meticulous and confident in your approach. Take your time and practice on coins with no value before you attempt it on a good coin or artefact.

This kit is an aid to revealing detail on some coins and artefacts (excluding gold and silver items) that have a high level of compact soil and surface corrosion, such as bronze-based coinage, which is very prevalent here in the UK, spanning thousands of years. For those in other areas of the world, I'm sure it can still be utilised. I know there are going to be many who will spit their feathers out with the usual comments such as, "you should never clean a coin." I like to see my coins' details, and many follow that same ethos. A mud disc is of no use to anyone, and most of the coins in museums were cleaned and preserved before display, so it can be done. If you own it, and as I said above, if it has no value in either form, then go for it! Break the mould and be a mad and bad detectorist!
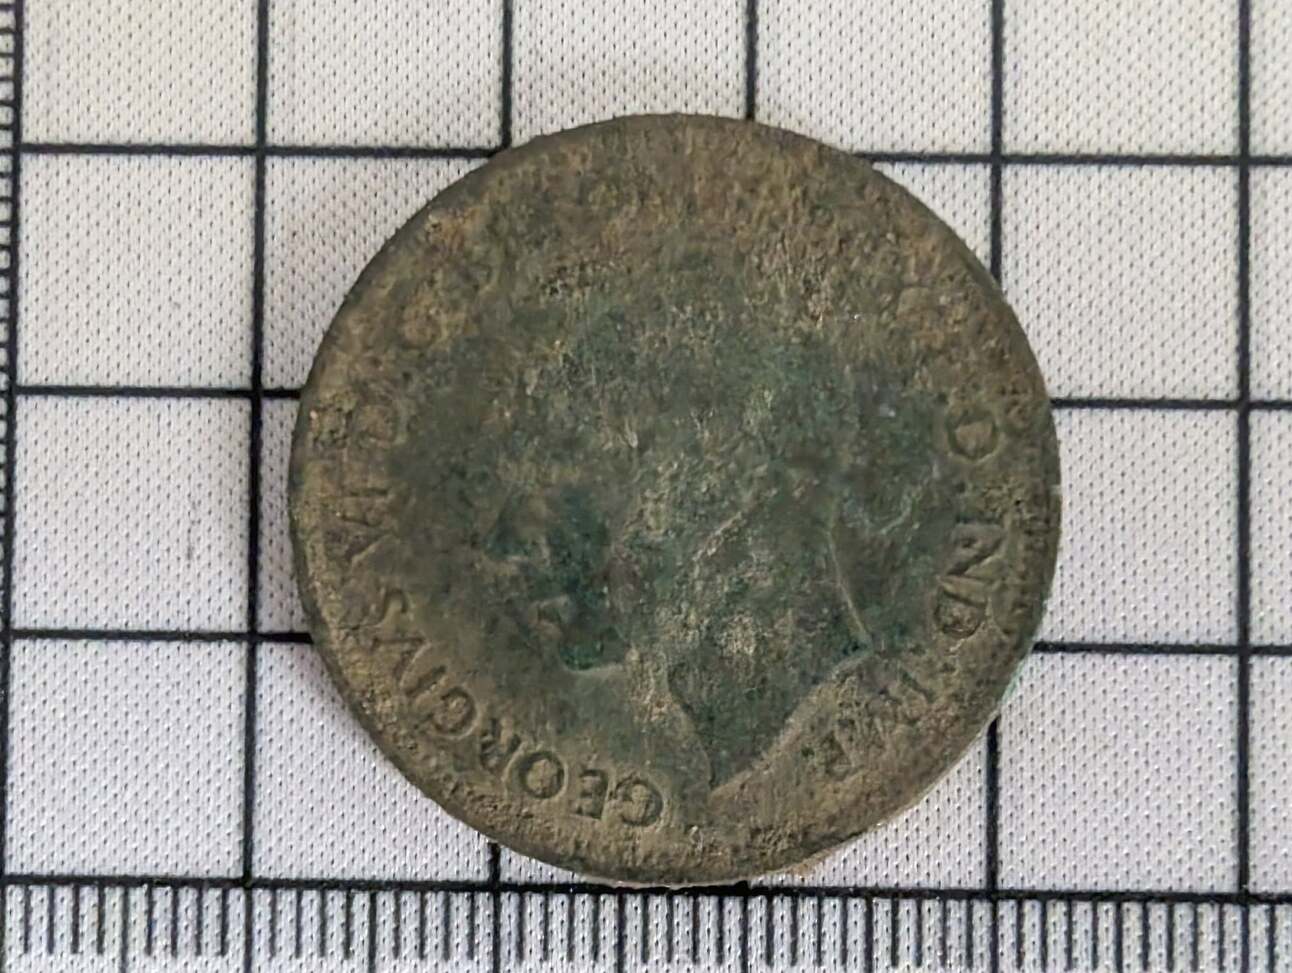
I have chosen a lightly corroded/crusted King Edward VIII 1937 one-penny piece as my test subject, and my reasoning is that it was lightly caked, and therefore I did not need to spend a few hours beavering away at it to reveal some details as it was not justified, to demonstrate I halved the portrait side of the coin to work on. I have used similar instruments in the past and have reasonable confidence in my work. The actual procedure began by utilising the white tip, which is the hardest and most abrasive tip in the pack (I think you can get a brass tip as an extra), caution is required, as some details can often be present in and on the actual patina, and once you rub this away, it is gone (I speak from experience).
Stage one's picture shows the coin as it was not long after being pulled out of my garden.
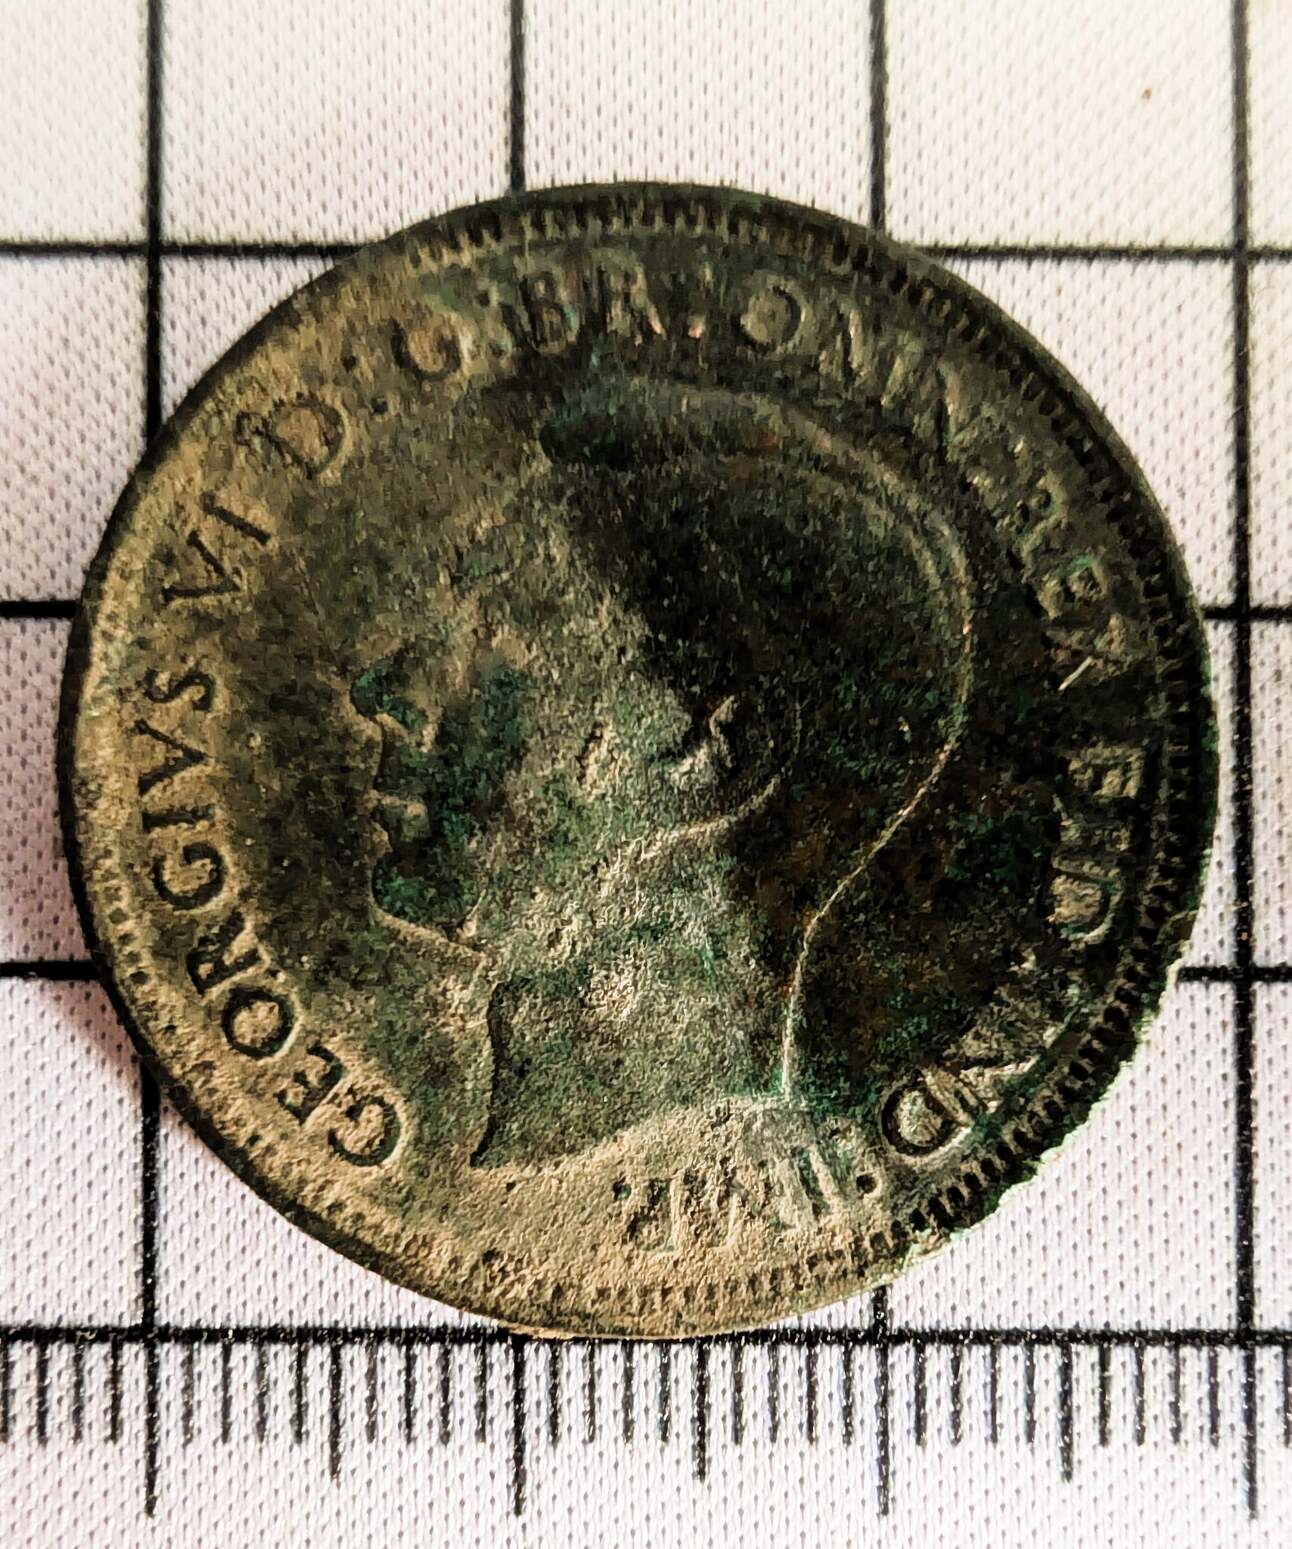
Stage two was after I used the white tip to remove the heavy soiling and some or if not most of the actual bronze disease on the half I was working on, on this occasion the disease was light and never pitted into the coin. A couple of sessions of sharpening the tip(s) were required, as these tips are consumables and will wear down.
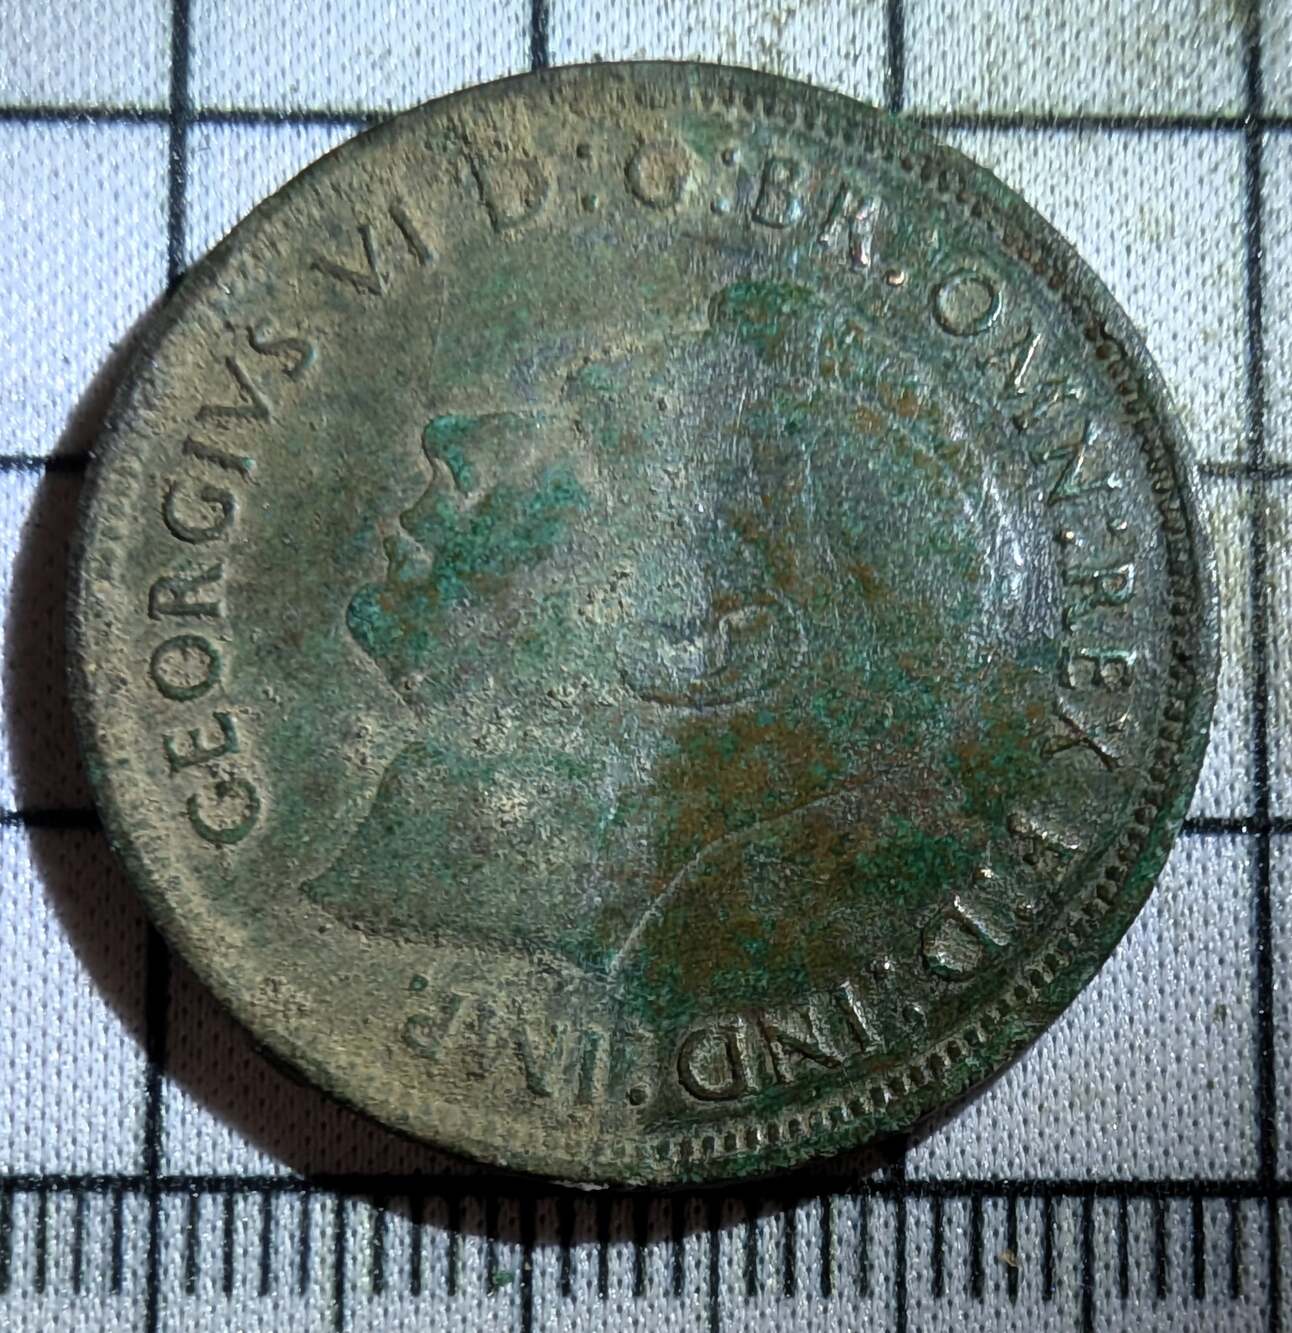
After Stage two, I moved onto the black tip, which is a much lighter abrasive quality. You are required to keep the points sharp by sharpening on glass paper, a fine diamond stone or even a dart sharpener, afterwards this allows for much more intricate work around finer details. This can be a time-consuming process, but well worth it in the end.
After working the coin and using a form of magnification to fine-tune my work, I move onto clearing the dust and residues left behind with a microfiber cloth helped with the liberal application of some Isopropanol alcohol. This removes finger grease and any residues left behind from the pencil tips; it evaporates and leaves a clean base for the wax preservation.
This wax goes a lot further than you would think, so when you have a small amount on your finger, I would say use half that amount before applying it, then work it hard into the surface of the coin before buffing the coin up. This wax allows what I would call a matte sheen and will not provide a super shiny finish, nor is it designed for that, otherwise you would lose contrast and details.
I hope you found this helpful, and my apologies on the not so perfect pictures, photographing coinage is like photographing glass paperweights in that it looks easy until you try, so I thank you for your time.
Regards J.Ritson